Add a User
1. Click the Admin tab at the top of the screen and the Users option directly underneath. The Users screen appears showing a default display of All users.
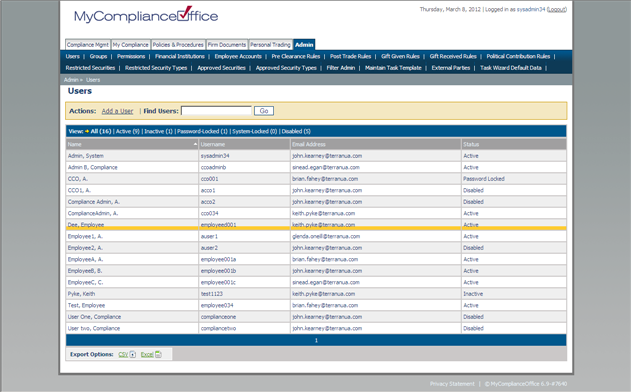
2. Click on:
• Active to view active users only
• Inactive to view users whose login attempts have passed the failed login threshold.
• Password-Locked to view users who have their password locked
• System-Locked to view users who have failed to answer the security question correctly and are locked out of the system.
• Disabled to view users who have been removed from the system.
3. Click Add a User. The user details input screen appears.
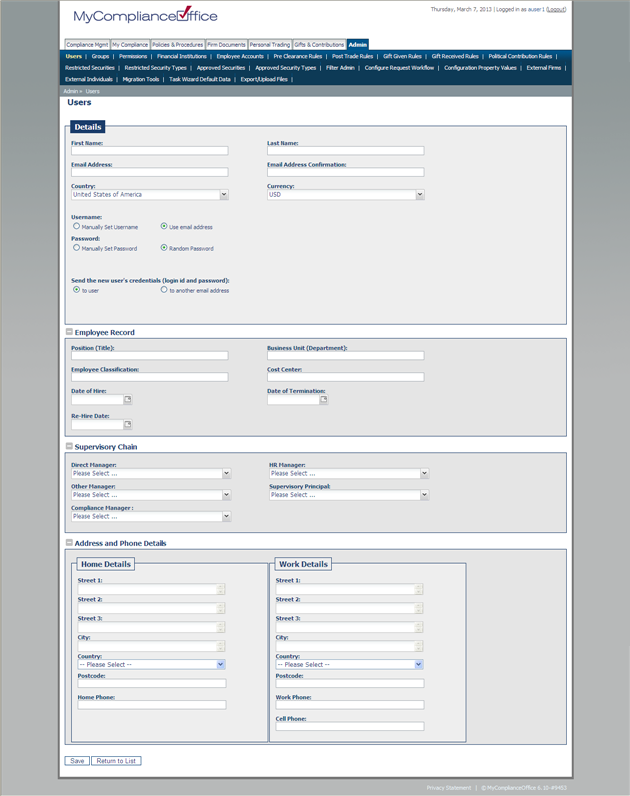
4. Enter the following information:
• First name -enter the user's first name
• Last name - enter the user's last name
• Email Address -enter the user's email address
• Email Address Confirmation - enter the user's email address again for confirmation
• Manager Name - choose the user's manager from the drop-down list. This is an optional field.
• Username - Choose whether to enter a new username or use the user's email address
• Password - Choose whether to manually set the password or use a system generated one
• Send Credentials -Choose whether to send the details to the new user or an alternative email address (this is useful if a employee is not yet setup on your firms email system and you want to verify that their account is setup by entering in your own email address).
• Employee Record
• Position(Title) -Enter the user's position. This is an optional field
• Business Unit(Department) -Enter the user's business unit/department. This is an optional field
• Employee Classification - Enter the user's classification. This is an optional field
• Cost Center - Enter the user's cost center. This is an optional field
• Date of Hire- . Select Hire Date. This is an optional field
• Date of Termination- Select Date of Termination. This is an optional field
• Re-Hire Date-Enter- Select the user's Re-Hire Date. This is an optional field
• Supervisory Chain
• Direct Manager - choose the user's direct manager from the drop-down list. This is an optional field
• HR Manager -choose the user's HR manager from the drop-down list. This is an optional field
• Other Manager - choose the user's other manager from the drop-down list. This is an optional field
• Supervisory Principal - choose the user's Supervisor from the drop-down list. This is an optional field.
• Compliance Manager - choose the user’s compliance manager from the drop-down list. This is an optional field
• Address and Phone Details
• Street 1 - enter the first line of the users address. This is an optional field
• Street 2- enter the second line of the users address. This is an optional field
• Street 3 - enter the third line of the users address. This is an optional field
• City - enter the city. This is an optional field.
• Country- enter the Country. This is an optional field
• Postcode - enter the users postcode. This is an optional field.
• Home Phone - enter the user’s home phone telephone number. This is an optional field.
• Cell Phone- enter the user’s cell phone telephone number. This is an optional field.
5. Click Save to add the new user (or Cancel to cancel).
6. The Group Membership page is displayed with a message confirming that the user has been created.
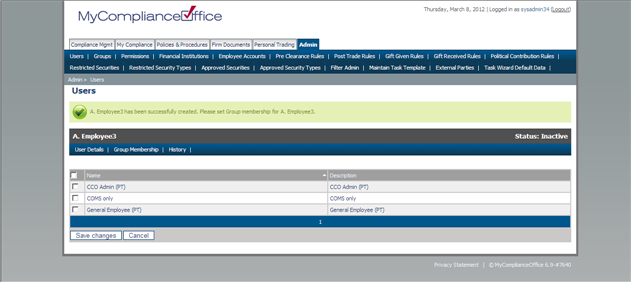
7. The next step is to assign the user to a group(s). Click on the check-box beside the appropriate group(s). This step is necessary to enable the user to login successfully to the system.Select Save Changes to submit the group or Cancel to remove the group assignment.
8. The new user will remain Inactive until they have logged into MyComplianceOffice for the first time.