Statement Processing
1. Click the Personal Trading tab at the top of the screen.
2. Click the Statement Processing tab. The Statement Processing page is displayed with a tree view of the scanned-in processed and unprocessed paper statements belonging to employees of your firm. Statements that have been processed are listed in the processed folder by year and quarter according to the document date.
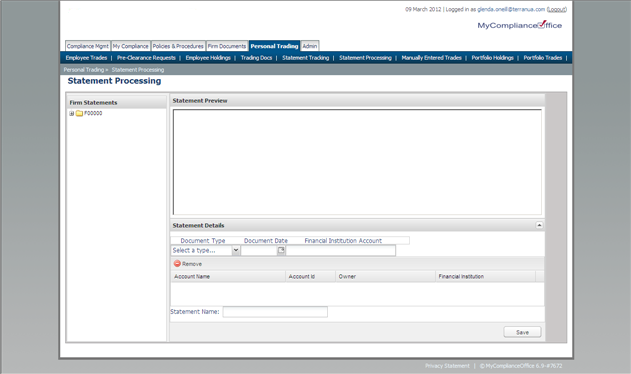
3. Under Firm Statements, click on an unprocessed PDF scanned document which is listed under the name of your firm.
4. In the Statement Preview window; the PDF is viewable. Use the scroll bar in this window to view the entire document.
5. In Document Type, select STATEMENT or CONFIRM.
6. For Document Date, select the last date of the period or report for a Statement. Select the trade date on the report for a Confirm.
7. In Financial Institution Account, click into the field and begin to type the name of the account. Accounts that match will be listed. Select the correct account for the statement to be processed.
8. To select more brokerage accounts to list against this STATEMENT or CONFIRM, repeat Step 7.
9. The chosen account(s) are listed in a table.
10. To remove an account from this statement, highlight it in the table, and select Remove.
11. Click the Save button to process the Statement or Confirm.
12. Click OK to confirm the new title for the Statement or Confirm.
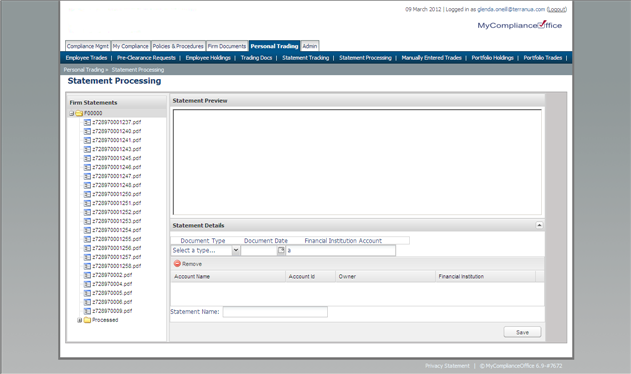
13. The Statement or Confirm is now listed under the Processed folder, in the correct Year and Quarter sub-folders, e.g. 2012, Q1, which corresponds to the Document Date chosen for the Statement or Confirm. This statement can now be tracked against the financial institution account(s) on the Statement Tracking page for any given period, and can be reviewed on the Statement Review page.
Created with the Personal Edition of HelpNDoc: Free Web Help generator