Configure Request Workflow
The Configure Request Workflow section is where the admin can customize the static screen information that will appear to users when they add a pre-clearance request, or add a request via Online Declarations. These include customizable field labels and feedback messages.
1. Click the Admin tab at the top of the screen and the Configure Request Workflow menu option underneath. The current task templates are listed.
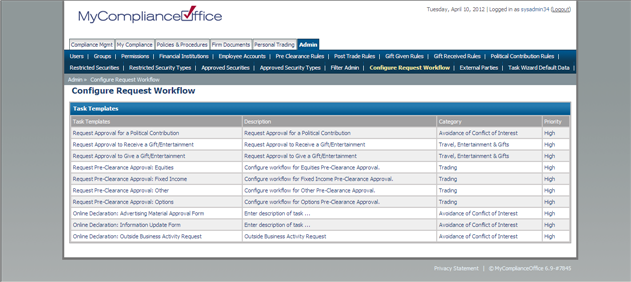
2. Click on the task template name to open the template (e.g. Request Pre Clearance Approval: Equities).
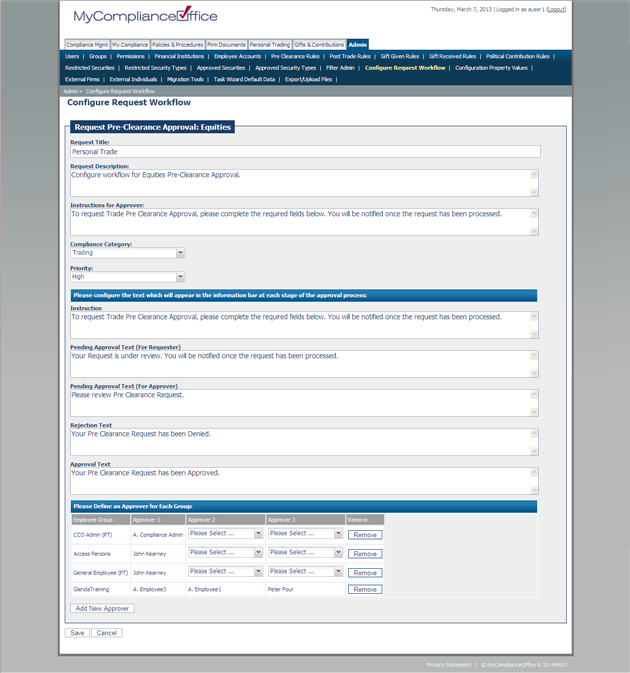
3. The default settings for the relevant task are displayed.
4. Change the field descriptions, compliance category, priority, instructions and information bar texts to fit your firms business.
5. Define the assignees for the specific task by clicking on the Add New Approver button. Select the appropriate group from the drop-down list.
6. Ensure the group priority is reflected correctly (e.g. user A is a member of more than 1 group - Group 1 and Group 2. Group 1 has Mr X as assignee, and Group 2 has Mr. Y as assignee. The highest priority group will take precedence so this means that User A’s request will be assigned to Mr X as he is the assignee for Group 1, which is the highest priority.
If you wish to escalate to more then one person, add an approver 2, and approver 3. If the request is approved by approver one, it will be automatically assigned to approver 2 for review and so on.
7. Click on Save to commit your changes to MyComplianceOffice (or Cancel to remove all changes and go back to the Task Templates list.)
8. A confirmation message is displayed confirming the change was made to the template.
Created with the Personal Edition of HelpNDoc: Full-featured EPub generator