Add an Approved Security
1. Click the Admin tab at the top of the screen.
2. Click the Approved Securities tab. The Approved Securities page is displayed with a tabular view of the current securities that are to be auto-approved.
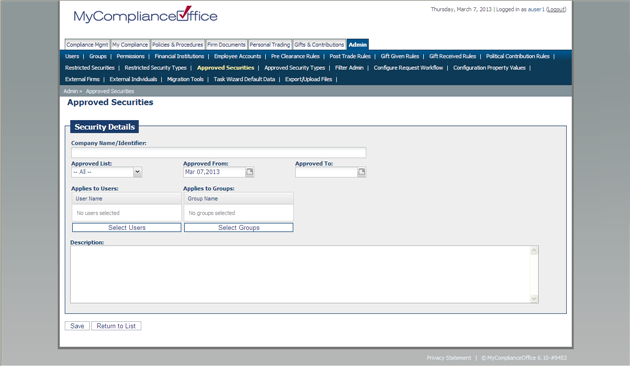
3. Enter the following information:
• Security Name/Symbol -enter the ticker symbol, or part (or all) of the name of the security you wish to auto-approve. (If the security is not found then click on Enter Security Details Manually to add the security details to MyComplianceOffice).
• Choose the security from the list provided
• The security name and symbol are automatically populated.
• At least one of the security identifiers (CUSIP, SEDOL, ISIN or Other) is automatically populated.
• The Security Type field is automatically populated, e.g. Equities.
• Approved List - select the list you want to approve from the drop down menu provided.
• Approved From - select the date the restriction is to be effective from. The default is today's date.
• Approved To - select the date the restriction is to be lifted.
• Applies to Users - select the users the auto-approval is to apply for.
• Applies to Groups - select the groups that this auto-approval is to apply for (ignoring the users and groups fields will auto-approve the security for everyone)
• Description - enter any additional details that may be relevant about the auto-approval.
4. Click on Save to submit the auto-approval (or Cancel to return to the Approved Securities page.)
Created with the Personal Edition of HelpNDoc: Free HTML Help documentation generator